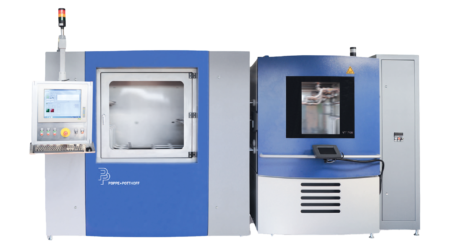
In rubber processing and tire production, non-contact inline and offline measurement and inspection systems can provide significant benefits in process monitoring and quality control, says Glenn Wedgbrow, business development manager at Micro-Epsilon UK
Many rubber processing and tire manufacturing companies seek to use inline inspection and measurement equipment to provide continuous monitoring of the process to ensure quality at every stage.
Micro-Epsilon specializes in measurement technology and provides a range of non-contact, inline and offline systems for process monitoring and quality control. Their solutions include systems tailored for rubber processing, capable of measuring strip thickness, length, width and profile. For tire manufacturing, Micro-Epsilon offers systems to measure thickness profiles of tires, treads, sidewalls and inner tube linings, as well as other critical tire dimensions. Additional systems support color coding and marking of tire treads.
These measurement systems offer distinct technical advantages in terms of measurement accuracy, thermal stability and reliability, backed up by installation, servicing, maintenance and technical support.
These advantages include fully automatic calibration. The systems periodically re-measure against a known reference and have integrated measurement sensors in the framework and mechanical parts, which measure the thermal expansion of the system. The software then compensates accordingly.
Inline and offline profile measurement of strip thickness
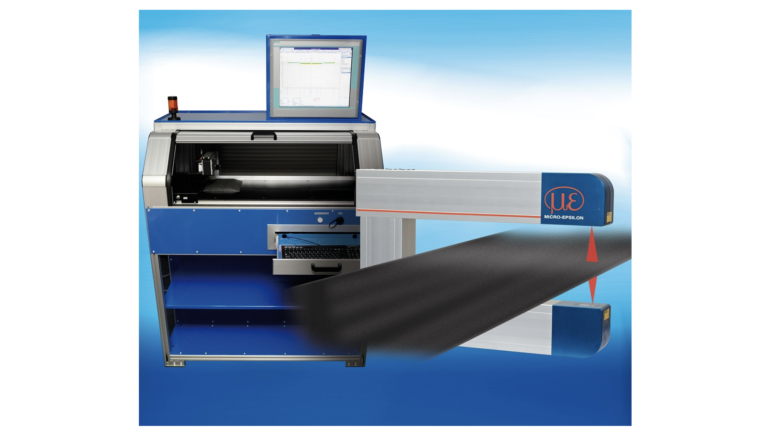
Micro-Epsilon’s RTP 8302 is a C-frame system that measures the thickness profile of rubber strip and sheet, part of the thicknessControl family. C-frame systems are modular in their design. They can be installed in tire production lines, extruders, roller heads, calendar lines and inspection rooms, providing reliable, high-precision measurements that can create a basis for controlling the production process and product quality.
C-frame systems measure differentially. An application-specific (confocal, capacitive or laser triangulation) displacement sensor is integrated in the upper and lower arms of the C-frame. The thickness of the target material is derived from the distance between the two sensors and the resulting signals. By combining highly efficient signal processing algorithms and visualization software, the system is able to achieve accuracies in the sub-micrometer range.
The C-frame can be used as a traversing thickness measurement system on linear axes to ensure full-width measurements of the target profile.
The control and analysis software is developed in-house by Micro-Epsilon to match the needs of the rubber processing and tire manufacturing industries, providing the required functions in order to continuously record and evaluate production quality. This includes graphical user interfaces and the ability to store multiple product libraries. The software also supports and displays statistical process control (SPC) parameters as well as other process capability analysis and reporting methods such as Six Sigma ĈPK and ĈPM. Various fieldbus interfaces are also available, enabling integration to the customer’s production control systems.
Fully automatic calibration ensures that measurements are not affected by temperature, enabling the system to be installed as a fixed, inline measurement system in harsh production environments, without the need for calibration or manual adjustments. All sensor technologies used are non-contact, wear-free and do not use isotopes or x-rays.
C-frame systems can be used to measure strip widths up to 1m and strip thickness from <1mm up to 18mm. Accuracies are from +/- 5µm.
Measurement systems for tire audit tests
Before delivery, tires undergo a comprehensive testing process to assess parameters such as tread width and geometry. Only tires that pass all tests are approved for use. Continuous auditing has helped reduce error rates over time, lowering the risk of accidents and improving vehicle safety. These procedures rely on various inspection, monitoring and control technologies.
Inline weight inspection of running tread profiles for passenger and truck tires
The dimensionControl TMWI 8302.LC system is suitable for the inline weight inspection of continuous running rubber profiles (tread pattern or sidewalls) for passenger and truck tires. Based on the force measurement principle, the inspection system uses two load cells that measure the deflection of the measurement conveyor. These sensor elements are attached to a massive construction, which ensures a long-term mechanical stability of the system.
The measurement conveyor uses precise and balanced aluminum rollers with special surface treatment. This ensures a low deadweight, avoids the influence of unbalance and eliminates material sticking. Data obtained from the load cells are processed in the implemented PLC cards which determine the measured weight mathematically. The software included offers a variety of measurement data processing, definition of design profiles, statistical analysis of measured profiles and diagnostic tools.
Tire geometry inline inspection in TU machines
Monitoring tire geometry – that is, the measurement of radial or lateral unbalance, as well as side wall detection for bulges, constrictions, dents etc – is one of the most important inspections at the end of the production process. The TGI 8302.LLT system can be integrated while offering precise measuring results. It uses three profile sensors which reliably detect bulges and constrictions as well as radial and axial unbalance. The sensors are integrated in a robust mechanism and applied so that the total surface of the tire can be detected within one rotation. The tester can then visualize the tire surface, hide the tire lettering, filter data, perform a vibration check, inspect the tire size and classify the degree of a defect.
Non-contact inline profile measurement of inner liner material
During the production of inner liners, the thickness profile of inner liner material is measured immediately after the calendar using the thicknessControl TIP system. Accurate precision of the non-contact optical system ensures high quality and security of the product produced. Being equipped with optical sensors, systems of the TIP family are designed as O- and C-frames. Temperature fluctuations of the measuring mechanics are also detected using distance and temperature sensors and are therefore algorithmically compensated.
Non-contact inline profile measurement of tread strips
The thicknessControl TTP series profilometer measures the thickness profile of tire treads and sidewalls during the extrusion process. It supports real-time process monitoring and provides data for quality documentation. The system uses optical sensors and features a user interface designed for extrusion operations, offering relevant data for managing the production of tread and sidewall materials.
Offline profile thickness measurement of tread strips and sidewall material
The thicknessControl TCP8301.T-Offline profilometer is used for sampling tread, sidewall and inner liner materials after extrusion. It provides high-precision measurements to support production control and quality assurance. The system uses laser triangulation sensors, enabling measurements independent of material properties. For accuracy, sensor alignment is carried out using dedicated optoelectronic tools. The system also includes an in-situ calibration unit and is designed for ease of use.
Non-contact inline length measurement of tread strips
In tire production, tread strips are cut from extruded rubber material. The TLS 8303.I optical testing system is integrated into the extrusion line to measure the strip length immediately after cutting, ensuring consistent and high-quality production.
The system inspects the profile and length of each strip using two cameras that capture images of the cutting edges. Deviations from the target cut length are detected by comparing these images. The cutting edges are analyzed using a stabilizer filter and various image processing algorithms to accurately assess strip length.
Inline inspection of colour codes on treads
The TCC 8303.I system marks the running surface, which is output after the extruder, inspects the color lines for their completeness, and measures the width of the running strip. The integrated TCC 8303.I system was developed for the inspection of color codes on the running surfaces of tires. The cartridges for the marking are inserted in a holder. A pneumatic height adjustment and servo-controlled horizontal positioning ensure a straight line and optimal position of the code lines. The color code is immediately inspected by an image processing system.
RELATED: Hyundai Motor Company and General Motors have announced the next big step in their growing alliance: the co-development of five all-new vehicles, building on their framework agreement signed in September 2024. Read the full story here
